High Summer

Monday, April 29, 2013
Okay okay, as you guys can see from the post title that I can't find a suitable name for this set of nails so I stole it from the name of Pandora's soon-to-launch collection of charms lolol.

I didn't take much pictures this time round, because it was mainly just Phyl slowly buffing off the 3D from the previous set, and applying colours and laying the sequins in place - things I've already shown previously.This time I opted for a simpler design with small accents, but something that Phyl did just as beautifully and skillfully!


I actually wanted Pink, Purple and Turquoise for the other fingers, but after I chose the sequin colours (which were mainly pinkish), I decided to go ahead with Purple, Mint, and Turquoise!

The design on the thumb is the same as that of on the ring finger - some of you might have already seen the picture that I posted of it on Instagram right after I got it done!
 
The sequins were placed encased in hard gel, and Phyl did 2 layers for me, personally adding the sequins individually to each nail and I really like the final result! Got a lot of compliments from my friends, family, and fellow bloggers regarding this set of nails! Even my manager Freda said it's pretty!

It's been about 2 weeks now and the nails are perfectly intact (as per usual) and the only difference is that my nails have already grown out a bit. Can't wait to head back in May for another set! Already got my appointment booked to do my nails with a good friend of mine ^~^.

I would highly recommend you follow her on Instagram for live updates! But if you want a rough list of her portfolio and service menu:

Tutorial: How to contour your nose

Monday, April 15, 2013

Got a new video up over the weekend and it's a video that was previously requested on an old blog post of mine by a reader who asked if I could do a tutorial on how to contour your nose... and so here it is!


I recently attended a make up lesson over at Make Up Forever (MUFE for short)'s new Make Up School over at Sephora NAC, and one of the items I got was this Sculpting Kit that was used during the lesson.
The moment the beauty trainer tried this on me... I WAS SOLD. I really liked how well both colours in the palette suited me and I knew that this was going to be the kit for me. Have been using it ever since I got it about 1~2 months back??

They also have other different types of lessons, and they are very affordable! If you're a real newbie to makeup, this is something you will definitely benefit from. Tools and products from the lesson are fully provided for - and you won't be forced or asked to buy products because the trainers are not doing sales. Just let them know if you want to get anything or not after the lesson.
The lesson I attended was the 30 minute lesson, for Simply Perfect Complexion. The lesson was really enriching and I got to learn more tips about makeup than I thought I knew.


Pandora's High Summer Collection

Saturday, April 13, 2013
Got the opportunity to head on a yacht trip with fellow bloggers a few days back thanks to Gushcloud and Pandora. We got to preview their upcoming collection - the High Summer Collection during the short yacht ride.

For those of you who haven't heard of Pandora, they are actually a brand specialising in charm bracelet, and both charms and bracelets are sold separately so you can truly customise a personal bracelet for yourself, which could hold more meaning for you when you look at your charms.

I have a friend whose boyfriend bought the bracelet for her, and for every bigger occasion (they recently bought a house together so he bought her a house charm, aww) he'd get her a charm to put onto the bracelet. I personally find that it's very sweet, and looking at the bracelet would remind her of the special moments.

First thing we saw when we got on board... was that they had a big collection of their charms all laid out. All of our eyes went O.O when we saw the huge array of beautiful charms. Don't just take my word for it, see it for yourself - they're simply stunning!

The rest of the time, us girls spent chatting, eating, chilling, and taking pictures!

Some pictures are from Tammy and Shine.

With Donna and Tammy, and our lovely managers Freda and Sheena.

with Tammy~


Shine~

Tricia (who very kindly gave us a ride back to Vivo after the trip) and Freda!

Group shot with the bloggers, our managers, and the wonderful hosts from Pandora!

Thanks for the wonderful day, Gushcloud and Pandora!

For listing of Pandora outlets/counters: click here.

Silver charms start from $53 if I'm not wrong. The High Summer collection will be in stores from mid-May onwards :).

Top and Bikini from H&M, shorts from Bangkok :).

Blonde Ombre

Tuesday, April 9, 2013
If you've been following me on Facebook, Twitter, or Instagram, you would have already seen pictures of my now blonde ombre hair.
Shunji Matsuo Hair Salon @ 313
313 Orchard Road, #03-26, 313 @somerset    
Singapore, Singapore 238895 
Phone: 6238 0226
*Quote "Blogger Yi Jing" for 10% off all chemical services!

What you haven't seen though, is the process of getting there. Which is what exactly today's post in on~ As like any usual hair-related posts.

Before:

I told Caely what I roughly wanted, and maintained my base colour because I think the colour really compliments my skin tone and I have gotten a lot of compliments on it! She then decided that she'd bleach my hair twice (rather than once with strong bleach, twice with weaker bleach is less damaging for the hair) before toning it.

After 1st bleaching

2nd bleaching

Caely picked out this honey-toned Pearly Milkshake to tone my hair with!

After toning...

End result!

A couple of weeks later, I headed back to get my roots touched up and Caely decided to further tone the colour for me, to remove some of the yellowish tones in the blonde.
She picked out this ashy green colour for me which was supposed to fade in a week and tone down the yellow in the blonde. Here's directly after the 2nd toning!

After the colour has faded, here's what it looks like! Uber digging it! Am thinking of heading back soon to try out this purplish shade that Caely told me they will be bringing in!

Shunji Matsuo Hair Salon @ 313
313 Orchard Road, #03-26, 313 @somerset    
Singapore, Singapore 238895 
Phone: 6238 0226
*Quote "Blogger Yi Jing" for 10% off all chemical services!

Silkwrap @ D'Nail Palette + April Promotions

Monday, April 8, 2013
I previously mentioned that I got the crack on my right hand, and proceeded to cut off the nail (so my right nail is gel-extended now) but this time it happened on my left hand and was causing the gel polish above my nail to slightly crack as well. About 2~3 weeks ago, I headed back to D'Nail Palette to mend a crack on the side of my left nail thanks to removing my retainers.

So sorry to Phyl who had to redo the nail for me, along with the 3D ribbon. But she was so fast that I was done with the nail very quickly.

So, what is silkwrap??
Silk wrap is actually the traditional method of mending cracks in our nails, using (as the nail suggests) a piece of silk. Of course, I don't suppose the silk is the same type that we wear usually, but I'm guessing it's something similar.
Silkwrap is not listed in D'Nail Palette's service menu, but if you are interested you can contact Phyl regarding the price of it.

She started off by removing my 3D ribbon and the gel polish, followed by removing the layer of hard gel I had on my nail so that the silk lays directly over my nail. After which, she measured and cut out a suitable sized piece of wrap to place over the cracked area. I didn't take a picture of the crack because it cracked from the undersize and is quite hard to see.

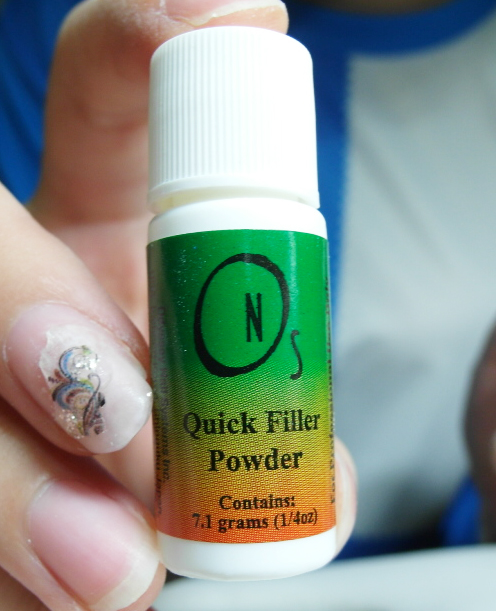
She then glued the wrap into place, and used a spray for it to dry quickly after applying the filler powder.

The mending process itself was fast and my nail looked as good as new after the silkwrap.
You can barely even see the silkwrap on my nail! Anyway, notice how long and healthy my nails look despite all the soft gel designs I've been getting?? That's all thanks to the hard gel overlay Phyl has done for me! My nails had never been able to grow out so long without splitting!

She then continued to help me do up my design. Saw her make her handfolded ribbon on the spot!! From this....
To this!
 

Today, even after removing my retainers several times, the area that was silkwrapped is still very strong and sturdy, without a single chip! i highly recommend this to those of you whose nails always chip and you don't bear to cut them!

Anyway, Phyl has decided to launch monthly specials for selected designs, and they will be for only $55 for the select month! Colours are customisable. Here are April's designs!


Fuente Forte + Flowy Florals

Saturday, April 6, 2013
Headed to town a few days back to go try out a new hair massage that's going to be available in salons that carry Shiseido products soonish (Shunji Matsuo has already started using Shiseido Professional products already! I know the main salon has, and I really hope that Caely and Jasper from 313 decides to stock up on Shiseido products as well!).
The product, the Scalp Firming Cream (part of their Fuente Forte range), is actually part of an in-salon treatment that helps to firm up your scalp!

After washing your hair, an entire tube of the firming cream is applied on to your scalp and and you get pampered with a very relaxing massage. Two thumbs up! My hair felt a lot lighter and very silky smooth after the pampering treatment.

The massage was soooo relaxing!! Imagine getting this done before a big event for that perk-me-up (not just mentally - results has shown that the massage helps with defining facial contours as well as boosting radiance) or just to pamper yourself and your scalp after a tiresome week at work.


I was told by Janelle that she thought I looked very femine that day (and very much different from when I met her a year ago in shorts lolol) so I thought I'd also take the chance to exploit the good hair day (after the massage) to take pictures for an OOTD while waiting for B to reach home. Also, I tried a makeup look that Yvette shared on Twitter the other day and thought the results came out pretty well!

My fav picture of the lot was auto-shot by my camera while I was adjusting my corset top. When I saw that it was about to snap, I quickly turned to my lens and flashed a weak smile, thus explaining this picture. I'm glad I did that though - I really like this picture! Also, that skirt is actually a pair of shorts that looks like a skirt, uber comfy as well!

Top: Bangkok, Chatuchak | Shorts: Bangkok, Platinum Mall | Bag: Rabeanco | Watch: Kenneth Cole New York

Speaking of the outfit, both the shorts and corset tops were items that I set my eyes on in Bangkok very quickly. Helps that I unknowingly created an outfit for myself hahah. Paired the floral corset top with this pair of flared shorts because 
1. The corset was quite short (doesn't cover my belly button) and 
2. The shorts were high-waisted to cover my belly button without being too revealing. 
I've always been for mixing tight and flowy textures to balance out an outfit (refer to last OOTD,/a>) so I guess this isn't anything new.
Pictures were taken in B's brother's old room which may explain the different scene and why the room is so empty. He's getting married in May! Congrats to the happy couple :,).


Hair lovingly done by Caely from Shunji Matsuo @ 313! Quote "Blogger Yi Jing" to get 10% off all chemical services!


As you can see, my skin has cleared up very well thanks to DRx Clinic,! I still get break outs from time to time but makeup mode from my camera doesn't help hide flaws that show up under sunlight (y'know, those bumps that cannot be concealed because their shadow reveals them under sunlight?) so you can really see how well my skin is doing now. Itchy fingers still picks at her pimples though... ):

Nails by D'Nail Palette. Promotions for my readers available on my right sidebar :). Phyl is holding a promotion for the month of April for selected designs @ only $55! Check them out at http://instagram.com/weakbrains


Something random here... so before I left my house that day I decided to finally find out how heavy my bag is usually when I head to events (meaning with my usual stuff + cameras).... Stepped on the weighing scale with and without my bag and got the weight of my bag (which is the discrepancy in weight). And it was a whopping.... 3kg. No wonder my shoulder aches!
That's it for today's post! Have a great weekend everyone xx!