Korean Ulzzang Inspired Brow Tutorial. (Video + step by step)

Tuesday, May 21, 2013
Adding in onto the recent Korean Ulzzang trend, one of the key points for the look is the thick straight brow. This was a request on one of my YouTube videos previously, and I finally got down to doing it. Watch the video to find out how I fill in my brows!
This will not work if your brows are too arched (so if they are, let them grow out and get it reshaped).

Products used:

For those who would prefer a step by step tutorial, here's one! I have prepared an image, filling the brows in on photoshop.
*Base brow image credits to princess-livia.com. Editings to the image were done by myself.
1. Start with a clean brow.
2. Draw a straight line from the bottom-middle of your brow to the tail of your brow.
3. From the top-middle (highest point of your brow), draw a straight line to the front of your brow.
4. Fill in the rest of your brows, gradiating it to make sure it is lighter and softer in front.

Tip:
Try not to use a shade that's too dark to avoid the brows looking too harsh. Your brow colour should be up to 2 shades darker if you have light coloured hair, and 2 shades lighter if you have dark coloured hair. If you have lighter hair colour but very dark brow hairs like me, use a colour corrector or brow mascara to tint your brows :).

And voila! Here are your straight korean ulzzang brows! Fuller looking straight brows give the impression of a more youthful look. Let me know how you guys like this! ^^


Avance Eyelash Serum Review

Sunday, May 19, 2013
Haven't done a product review in a long time so here's one that I've tried out recently!

Avance's Lash Serum EX

I've always been a sucker for longer lashes, with a mascara being my first makeup buy back in Sec 1, so I jumped at the opportunity to yet again test out another lash serum. Today's review is on Japanese brand Avance's lash serum. Apparently Avance is an old name when it comes to lash serums because they have been manufacturing them for years.

This, I have been using for about 2 months and I gotta say I really like it!

This is my "before" picture, taken on 20th March, after one coat of the serum on both my top and bottom lashes.

And, after, on 10th May. This picture is on clean lashes

Personally, I feel that my lashes do feel a little longer, a bit fuller, and much more lifted (more obvious in the picture). The serum absorbs into the lashes quickly without leaving a film or a hard coat (like mascaras usually do) so it's optimal as a primer before mascara to protect your lashes as well. I haven't been wearing my fake eyelashes lately because I have been doing the "Ulzzang" type makeup (or at least it's inspired) and longer lashes really does make the look a little prettier/girlier without the use of falsies.

The serum comes housed in a 7ml glass tube (as seen at the top of the post) and has a mascara-wand-like applicator, which makes application fast and idiot-proof. The only thing about this that i don't like as much was that sometimes when applying onto the inner lower lashes, they accidenly poke my eye (probably because my lashes are too short) but other than that all's good. I usually go back into the tube before applying on the other eye because I'm greedy like that.

If you apply too much, it might leave a small droplet at the end of your lashes but it absorbs quickly so by the time I get to applying my mascara it doesn't hinder the application.

Even though it seems 7ml is very little product, I have been using it nearly every day and have yet to go through even 1/4 of the tube. The only down side is that lashes do not appear as full if you don't maintain it. Also, everyone's lashes does have a growth limit (meaning the maximum length your lashes can grow to) so don't be too bummed if your lashes don't grow out to as long as Kim K.'s.

I can't remember the price of this, but I believe it's SGD$39.90 and is available at Watsons and BHG stores in Singapore. For more information, check out Avance Singapore's Facebook Page.

Acrylic Florals with D'Nail Palette

Monday, May 13, 2013
Hi guys! Back with another post of my latest set of nails by D'Nail Palette!

Went back a few days back to refresh my design and to get some extensions done because my nails grew too long and ended up breaking off. The beds were shorter than the length of the nail itself, so I had no choice but to cut them off. Here's what they looked like before I went back. As you can see the polish itself was entirely intact.


Phyl did 6 extensions for me all together during this session. 3 on each hand - thumb, index and middle fingers because while my thumb's nails were still long, I had accidentally bent them and caused a weak point so she decided to do extensions for me instead.

Extensions and base colours later... she got on to doing my design for me! Crystals on the base of a few fingers, and floral acrylics on the index and middle fingers! She was very delicate while doing the detailed work - to place so many acrylic flowers onto the little area of my nails, PETAL BY PETAL.

She said that this was the longest time she had spent doing a design hahaha. I was there for about 3 hours+ (including removal and extensions) but definitely worth the time!! (I was supposed to do my nails on the 20th but she had a slot that day so I went down. Lucky for my friend.. if not she'd have to wait for me for 3 hours on the 20th since we booked a double appointment hahaha)

Look at my beautiful nails now!! I am uber loving it!!

After the first nail was done.. I immediately went "omg sooooo pretty". After the whole set was done, I was digging it even more!
We decided to keep the flowers matte for a slight contrast in texture, but if it traps dust (acrylic is porous, i think) I will get a top coat over it when I return to accompany my friend to get her nails done.

 Remember to check out my side bar for special promotions for my readers!

CLIO Gelpresso Burgundy Series Review

Saturday, May 11, 2013
Hi everyone! Got a new video up earlier today for a quick review of CLIO's Burgundy Series Gelpresso liners.
Here are more pictures and some more of what I left out in the video earlier.

The liners were sent to me a while back and I was very excited when I received it because it was a surprise package! The colours of the liners were beautiful and I couldn't wait to try them.

The packaging of the individual pencils came in the form of matte-tubed auto pencils. And like mentioned in the video, with the sharpener hidden at the base of the pencil for when it gets blunt. Irks me when I sometimes get the product on the cap though!

Swatches of Bloody Devil, Bloody Angel, and Bloody Sweet respectively.

My favourite is Bloody Sweet but I like the other two equally as much. The pencils are very creamy and smooth and what I forgot to mention in the video was that after it sets, it doesn't budge - but before that it has a little give for you to use it as a base colour or in a smokey look (which I have tried).

The Gelpresso liners are creamy yet firm which makes it easy to work with - and to draw thin lines with when sharpened. They are very smooth and glides on easily which makes it perfect for beginners! Colour payoff is very good as well as the liners are very pigmented.

CLIO Gelpresso liners are available at Watsons. For more information, check out CLIO Singapore's Facebook Page.

Wishing of you out there a Happy Mothers' Day!

DRx Journey Part 5 - Essential Facial (Plus) at DRx Medispa

Thursday, May 9, 2013
3 weeks back, I headed to the Mediaspa side of DRx to do an Essential Facial (Plus) ($215). Essential Facial (Plus) basically is an upgrade of the Essential Facial (which I will get to in a bit) with an extra step of Micro-dermabrasion - which uses a diamond-tip tool to exfoliate the skin.


The essential facial started off with basic cleansing to rid your skin of impurities so that the effects of the facial is optimal. Then the first step was Micro Dermabrasion (MDX) which not only exfoliates, but also boosts collagen production in the skin while helping to reduce the appearance of any scars. It's not painful at all (my first thought when I heard "diamond tip" was that it'd be painful lolol). All you will feel is a mild suction as the therapist glides the tool on your skin.

Then.... the painful part - extraction. What's a facial without extraction right? It was painful but definitely worth it! Their therapist was so skillful that there aren't any scars at all!

Next step: Ultrasonic Cleansing, which uses a device that uses sonic waves to deeply cleanse your skin and help unclog impurities. You will hear a ringing sound when doing this (I've done this twice before so this isn't anything new to me) especially when the tool is nearer to your ears.

Following that, the therapist will use the same tool to deliver nutrients (either Vitamin A, C, or E, depending on your skin condition. I did a Vitamin C one) deep into the layers of your skin using sonic waves as well. This boosts the efficiency of the product and higher rate of absorbancy (did you know that our skin absorbs only a small percentage of topical products?). I felt my skin firm up and was sooooo smooth after the vitamin c delivery!

Lastly, a mask is applied to soothe all the redness and to relax your skin. Was left on for about 20 minutes? The mask was so comfortable that I'm sure if i could lay on my side I would've fallen asleep.

This is me without makeup (with sunblock and hydrator from Derma-Rx) after the facial. My skin was soooooo smooth and soft I didn't need makeup hahaha.I kept touching my skin because it was so damn soft and smooth!!


The effects of the facial lasted a good 2 weeks before my menses arrived and screwed my skin up again with breakouts on the forehead T_T. However, except for the problem bit around my forehead, my skin has been awesome! I don't even need to use much foundation nowadays and the skintone is a lot more even. I've gone through a bottle of toner, AB, and ASL already though. Nearly finished with my cleanser so I'll be topping it up soonish.

For first timers, quote 'Jamie Tan' while making your appointment to get your first 3 consultation fees waived off! Call up 6733 1555 to book your appointment.

DRx 4 - Carbon Laser at DRx Clinic

Wednesday, May 8, 2013
Back with another update of my DRx journey! My skin has been clearing up pretty well, but I still break out from time to time, even more so during that time of the month when hormones run amok, but it is still definitely much better than when I first consulted with Dr Angela.

Before I get started onto the post, I wanna share with you guys for a special promotion for my readers! For first timers, quote 'Jamie Tan' while making your appointment to get your first 3 consultation fees waived off! If you're visiting Dr Angela or Dr David, it's ($50 for first consultation, $35 for subsequent) a total saving of $120! Call up 6733 1555 to book your appointment ^^.


Pink Ash + Bubble Gum

Wednesday, May 1, 2013
Hey guys! Sorry for the lack of updates recently. I've been in my rutt again but I just felt like I HAD to get this post up for y'all because I'm so excited about it!!

As you can see, it's another post about my hair colour with my favourite hair stylist, Caely!

Shunji Matsuo Hair Salon @ 313
313 Orchard Road, #03-26, 313 @somerset    
Singapore, Singapore 238895 
Phone: 6238 0226
*Quote "Blogger Yi Jing" for 10% off all chemical services!

A couple of weeks back, I headed back to the salon at 313 Somerset to get an ash pink colour from the new range of dyes that Caely brought in. It was supposed to turn out like a purple pink colour but for some reason it ended up looking more ashy than pink so it looked like grey with a pink undertone. Caely asked me after I finished with my treatment if the colour was okay, and I decided to keep to it because it created the effect of a very natural soft gradient from brown to grey (purple).

The first picture I tweeted after getting my hair done. Despite the filter, I'm sure you guys can definitely see how well the colours blended into each other.

We then had an event the next day and THE Shunji Matsuo himself (yes, in person) actually complimented the colour, saying it was very unique and hard to achieve! At that point of time I have already gotten loads of compliments about that colour, and this compliment made me soooo happy hahahah. Anyway, here's a shot of the colour:

This was after about 2~3 washes? The undertone doesn't show up well on camera. This is actually one of the dyes from the range of colour used  to tone my Blonde Ombre to remove the yellowness, so it was expected to fade very quickly.

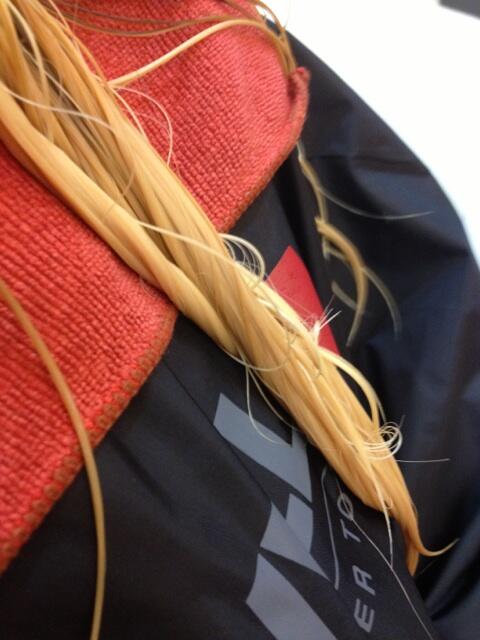
Today (or rather, yesterday because this post was published after 12), I went back to get my hair done because the grey has faded. I wanted a similar shade that would last longer but Caely told me it would probably only last a tad longer (maybe up to a month) than the previous colour so I asked her to advise on what other colours she would recommend. She previously remembered that I showed her a picture of this pastel purple colour and asked if I wanted such a colour in pink. I went ahead with her suggestion (I mean, she makes the best decisions for me) and let her remove some of the existing colour in my ombre with very mild bleach.

Back to blonde??

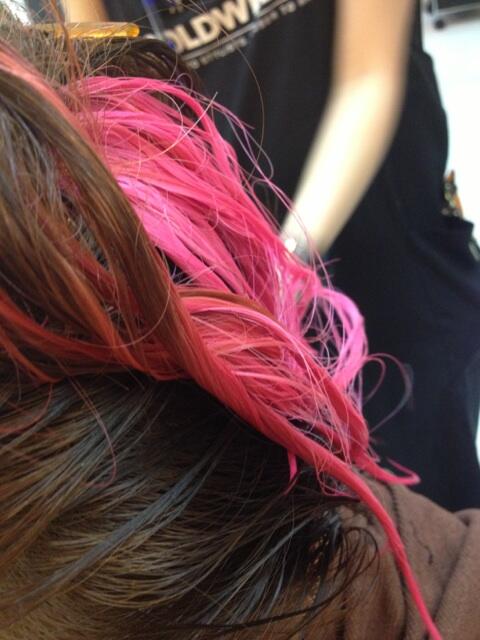
Next up, Caely cut out a few strands of my bleached hairs and went to test the colours before asking me which I would prefer. I made my pick and she worked the dye into my hair - she also left it on for longer so that the colours would be more lasting!


Look at this beautiful pastel magenta shade!! I wouldn't mind if I hair turned out this exact colour hahahah.

After treatment and washing the dye out, here's the colour on my hair!

A little blow-drying, curling, and a couple of waterfall braids later..
How to not love Caely and her team at Shunji Matsuo @ 313, you tell me!!

Anyway, the colour is not as light as it seems in the first picture. It's a bubblegummy highlighter pink now (closer to the shade as seen after washing/2nd picture after braiding), which will be expected to fade into the colour as shown. No idea why my camera took the pink in this shade. Just disclaiming in case any of you decides to look to Caely to get my colour and find it different from the picture lol.

I'm super loving this colour now because it also looks a bit coraly. It's a colour that is rather hard to explain, you'll really need to see it in real life to get a gist of it. Thank you Caely and team for working magic on my hair!

Shunji Matsuo Hair Salon @ 313
313 Orchard Road, #03-26, 313 @somerset    
Singapore, Singapore 238895 
Phone: 6238 0226
*Quote "Blogger Yi Jing" for 10% off all chemical services!